

Tracking funnels in Google Analytics – Part V
The last few posts discussed the issues of tracking a multi visit funnel where the order of events is important. I talked about solutions that exist on top of Google Analytics and described my solution for tracking, exploring and analyzing “real” funnels using Google Analytics, without the need for a 3rd party tool as well.
In this post I will guide you through the installation and implementation process of my solution.
The setup process is not trivial and requires some effort on your part, but I promise you will gain a lot from doing so.
Preparations:
- I would recommend creating a separate website profile. The reason being, it allows you to continue working with your current GA configuration without affecting its metrics and measures.
To create a new website profile, go to the Analytics Settings screen and click on the domain for which you want to add the new website profile. On the Overview screen click “Add new profile”, as shown in the following screenshot: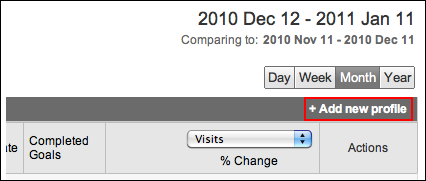
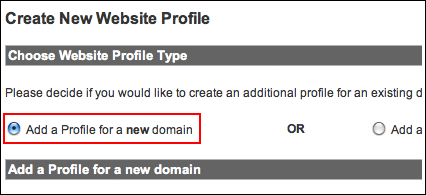
On the “Create New Website Profile” screen, choose “Add a Profile for a new domain” and type in the domain name (this should be your existing domain name):
- Now you will have to map all the relevant pages and events on your site. The Google Analytics Top Content Report will probably give you a hint as to which pages you should map (as they probably play a role in your funnels).
You should end up with a list of pages and events. (If you want to capture events such as “Button Click” etc., add them to the mapping table.)Your list should look something like this: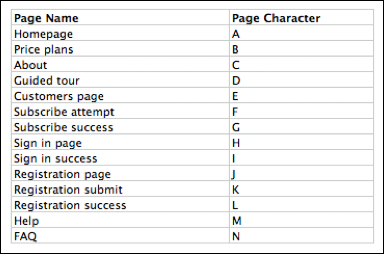
Important Note: If you have not created a separate website profile as suggested above, and you are going to map your landing pages, bear in mind that your bounce rate will go down drastically (as each landing page will send an additional pageview to GA).
- Now you have to define your known funnels. At this stage you should define the most basic funnels that do not have extra steps. For example, if you know that a user must pass through the Sign Up page and the Sign Up Thank You page, but there are several possible paths for reaching the Sign Up page, only set the funnel with these two steps. (In any case, at this stage I recommend setting the funnel to the minimum). Later on you will be able to expand and create more variations on it.
A good indication for what are your basic funnels is probably the goals you have already set in Google Analytics. At this stage you should only choose funnels that happen once per user. For example, a user will only sign up for your service once, but might check out several times. (Checkouts and other funnels that can occur more than once per user are dealt with by using custom variables, as described in my last post).If you have goals set for “Sign up”, “Checkout” and “Subscribe”, you will probably want to create two funnels as follows:- “Sign Up” – If you have a Sign Up form and a Sign Up Thank You page, then use these two pages as your funnel. Consider adding an extra step between the two for the form submission and maybe even for errors.
- “Subscribe” – As with the “Sign Up” funnel, use the Subscribe Form and Thank You Page as your second funnel.
- Once you have defined your funnels, add them to the JavaScript code and place the code on all your mapped pages. In the code below I have defined two funnels: bc and dk. Replace them with your funnels.
You will also have to change the pagename variable on each of your mapped pages (in the code below the pagename is “a”). Leave it empty if the page in which you place the code is not part of your mapped pages.You will also have to set the GA account, domain name (which should be the same as your current GA code) and custom variable slot and name (make sure to use a slot and name that is not in use by your current GA implementation).[javascript]
var pagename="a"; // set here the name of the page
var GA_funnel_account="UA-XXXXXXXX-X"; // set here the relevant GA account
var GA_domain_name=""; // should be the same as your current GA tracking code. leave empty if not in use
var customvariable_slot=3; // the slot used for the custom variable
var customvariable_name="path"; // the name of the custom variable
var funnels=["bc","dk"]; // list of tracked funnels/* multi visit funnel JavaScript code */
_gaq.push(function(){var a=_gat._createTracker(GA_funnel_account,"funnelTracker");if(GA_domain_name!=""){a._setDomainName(GA_domain_name)}});function __rc(e){var d=new RegExp("(?:^| )"+e+"=([^;]*)","i");var f=document.cookie.match(d);return f&&f.length==2?f[1]:null}function __gre(l){var i="",e="";var a=l.split("");for(var k=0,j=a.length;k<j;k++){i+="(?:[^"+a[k]+"]*("+a[k]+")";e+=")?"}return i+e}var path="";function funnelstep(r){var e="";var m=__rc("__utmv");var s=new RegExp(customvariable_slot+"="+customvariable_name+"=([^=]*)");var o=(m!=null&&m.match(s))?m.match(s)[1]:"";if(o!=""&&o.match(/.$/)[0]==r){return}e=o+r;_extgaq.push(["_setCustomVar",customvariable_slot,customvariable_name,e,1]);_extgaq.push(["funnelTracker._trackPageview","/funnel-events/"+r]);var l={};for(var p=0,i=funnels.length;p<i;p++){var q=e.match(new RegExp("("+__gre(funnels[p])+")"));if(q!=null){var n=q.slice(2).join("");q=e.match(new RegExp(__gre(n)+"(.*)"));if(q!=null&&q[q.length-1]==""&&typeof(l[n])=="undefined"){_extgaq.push(["funnelTracker._trackPageview","/funnel-unique-events/"+n]);l[n]=1}}}}if(pagename!=""){funnelstep(pagename)};
/* end of multi visit funnel JavaScript code */
[/javascript]You can see the original code here
- Optional steps, if you did not create a separate website profile for funnels:
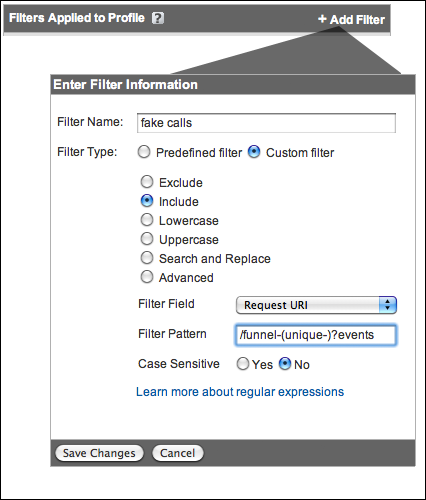
- Add filters to exclude fake pageviews, to maintain your current profile as is:

- Create a new profile and add a filter that includes only fake pageviews:
- Add filters to exclude fake pageviews, to maintain your current profile as is:
- Create your funnels – Define a goal for each step along the funnel. If you have 2 funnels: “bc” and “dk”, you should create 4 goals: b, bc, d and dk. Make sure you choose “Exact Match” in the “Goals Details” section.
In the following screenshot you can see an example of the “bc” event.
- Create a custom report for your funnels.
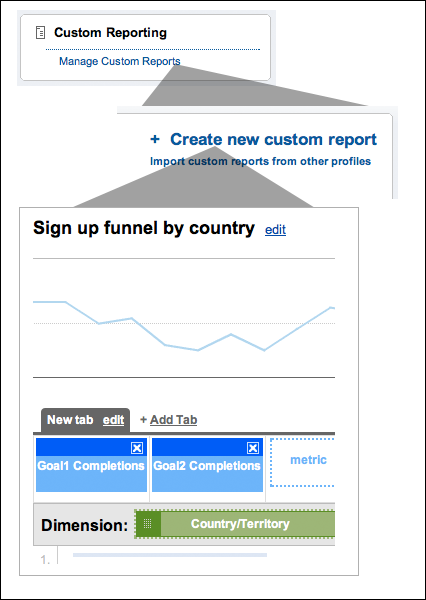 You can create multiple tabs in each Custom Report and set different metrics (goals) in each tab (the selected dimension will be the same across all tabs). This is useful if you have several variations for the same funnel. For example, if you have 3 funnels to activation:
- Landing page -> Sign up -> Activation
- Landing page -> Price plan page -> Sign up -> Activation
- Landing page-> Subscribe -> Sign up -> Activation
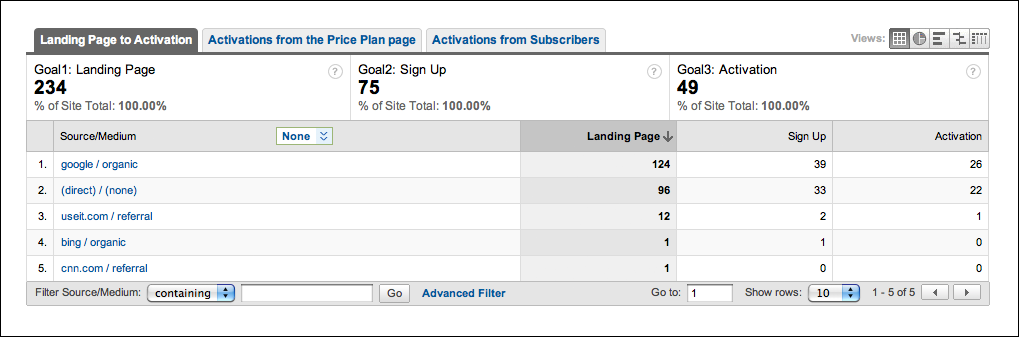
Then you can create one report with three tabs:
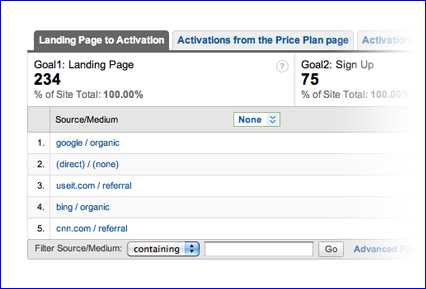
This way you can create several reports with different dimensions (e.g. activations by countries, activations by traffic sources, etc.)
That’s it. If you set everything correctly, the new tracking code will start sending relevant data to GA and you will soon be able to see your real funnels in Google Analytics without the need to work with an external funnel analytic tool.
If all you wanted is to see your real funnels and you feel comfortable with the funnels you defined, you can stop here. If you want to learn how you can use this solution to explore and expand your funnels tracking and optimization, keep reading and I will present some advanced techniques for exploring your funnels.
You can also check out my last post to get more ideas what you can achieve with this solution.
Analyzing the Results:
Mapping all relevant pages:
The first thing we did was map your site’s pages (map = assign a character for each page). You should now ensure that you mapped all relevant pages.
In a custom variable, the code ONLY stores marked pages. Therefore, if a user visits a page that was not marked with a character, this page will not be stored in their custom variable.
Let’s say you marked your landing page with the letter “F”. If you go to the Custom Variable Report and look for strings with “F” as the first letter, you can assume those users either landed on this page or visited unmarked pages before arriving at this page.
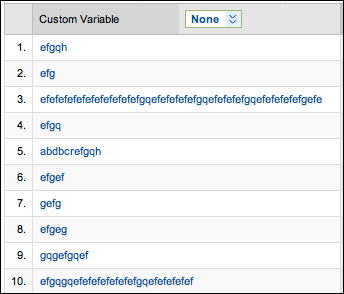
The best way to see this is by looking at the Custom Variables Report (under the Visitors section). Click on the name of the custom variable you set in step 4 (if you did not change it, it should be “path”). Look at the first letter in each row. If there are too many, concentrate on the most popular values (either the ones with the greatest number of visits or the ones with the most conversions to any of the steps in the funnel).
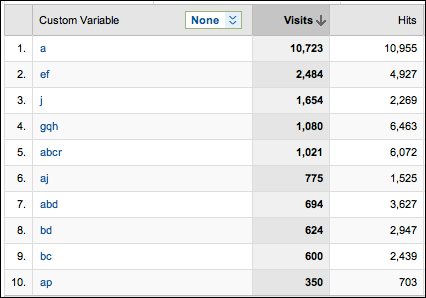
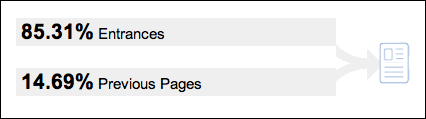
If we look at the above report, we can see that “a”, “e”, “j”, “g” and “b” were the first letters for most of my users. To be sure that those pages were most likely the landing page of your users, go to the relevant page on your site’s Google Analytics and check the “Navigation Summary” report of those pages. If you see that this page was the entrance point for most of the visits, then this page is probably a landing page:
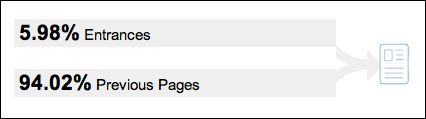
If this is not the case, check the previous page report and make sure all the pages there are mapped:
Expanding your funnels:
If you started with the most basic funnels (for example: Sign In form -> Sign In Thank You page), you should check what people viewed before they started the funnel, and how they got to the first step of the funnel.
The best way to do so is by filtering your basic flow and exploring the values in the Custom Variable report.
So for example, if your sign in page is “F” and your sign in thank you page is “G”, then only filter values with “f.*g”. This way, you will get a list of values that represent the different funnels people went through for this basic funnel.
If you have many values, I recommend concentrating on the most important ones: Ignore all values that produced a small amount of first step completion (i.e., the first goal, which in this example is the Sign In form). Assuming you do not have a “long tail” you will exclude the most irrelevant flows.
At this point you might find some pages prior to your first funnel step (Sign In form) that you should consider adding to your funnels (in the above screenshot you can see that the top 10 paths start with “e” or “g”). My suggestion here is to define the page as a step in a separated funnel. For example, if you had the funnel FG and you find that 70% of your users view page X, then you should create a new funnel: XFG, and not add “X” to the original basic funnel.
The second thing you should check is if you had any “middle” steps. There is a good chance people arrived at your Sign Up form but decided to first read some more about your services prior to clicking on the Submit button. You can check this in a similar manner: set the segment or filter to “F.+G” and look at the results in the Custom Variable report.
Maintaining your funnels:
You should perform the above on a weekly/monthly basis. Your funnels might change for all kinds of reasons. It can be a change in your traffic source blend or a change made by your designer/web master to one of the pages. While your basic funnel will probably stay the same, your variations might change and the best way to monitor this is to create a segment for each of your funnel variations (as described here) and follow up the amount of goals each of your segments produces.
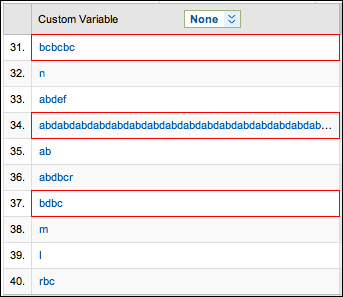
Loops in your funnels
By looking at the path your users went through, you can identify all sorts of problems, the most trivial being people who went through the same steps over and over again:
Summary
Regularly exploring your funnel data should be part of your optimization efforts. There are many things you can learn from watching your users’ unique paths on their way to your site’s goals, especially if you can point at a shared behavior among users. In some cases, you might find that forcing your users to go through one extra step in fact increases your site revenue, whereas in others, dropping a step might help increase the overall conversion rate.
Please feel free to contact me if you have questions or comments. I will be happy to assist you in implementing this solution on your site.


 Follow @cardiolog